Particle Engine Tutorial in Cinder Frameworks
- by Anthony
- in Uncategorized
- posted September 25, 2010
Hi everyone, in this tutorial we will go over the basics of creating a particle engine for use in special effects like fire. On CULearn there will be a folder titled “Particle Engine” that will contain the project we are creating in its various stages from beginning to end so if you get stuck and can’t figure out out how to proceed forward please feel free to use one of them as a starting point to continue through the rest of the tutorial. You can also use the Github link to download.
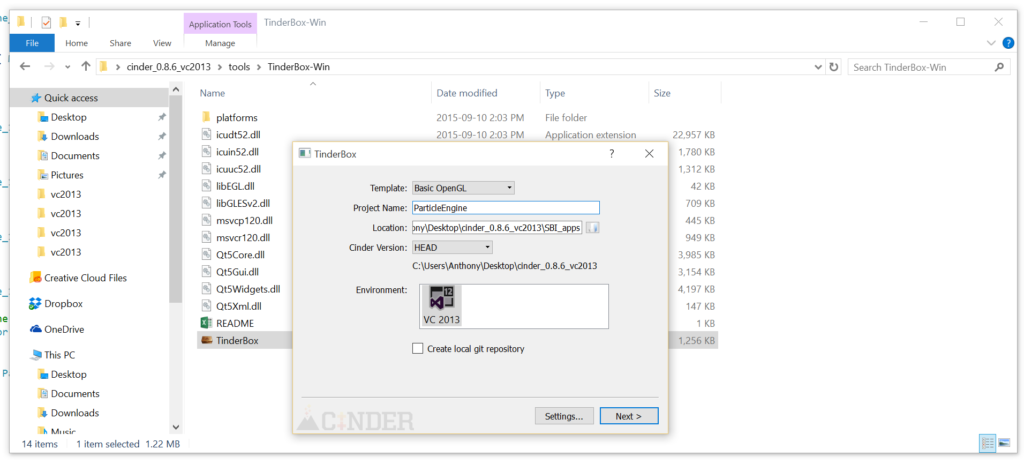
The first step will be use Cinder’s “Cinderbox” tool to create a project for our particle engine. Fortunately there is no libraries we need to link to so it is just a basic project such as shown below.
The Framework (ParticleEngine_1)
So the first thing we want to do once we have a project is lay out our basic framework. Almost all Particle engines consist of two classes:
- An emitter or particle controller that controls where the particles are formed and generally what they do. This class often will have methods such as “addParticles” and “removeParticles” as well.
- A Particle class that defines each particle, while also allow some random values of starting conditions so that there is some sort of variation to each particle giving a more realistic look to the particle system as a whole.
So let’s first create the Emitter class. Here are the steps (in Visual Studio 2013):
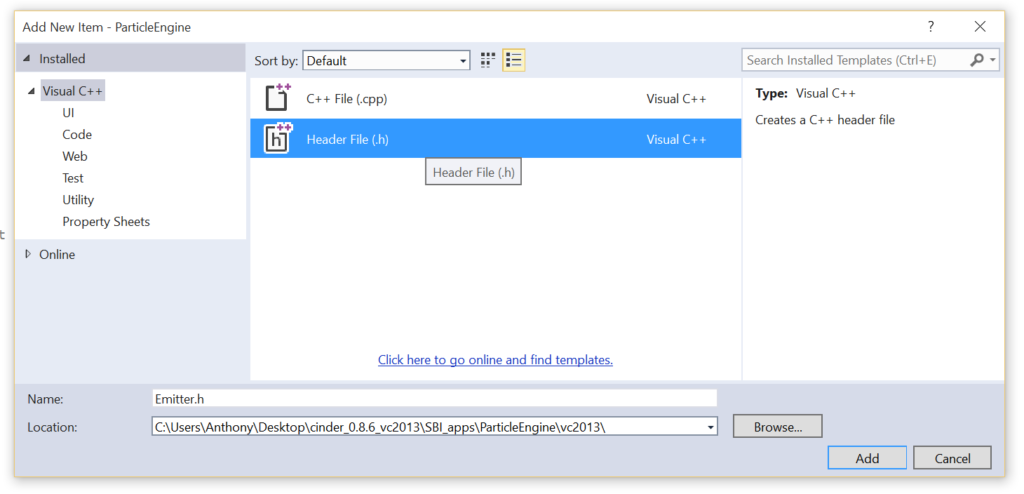
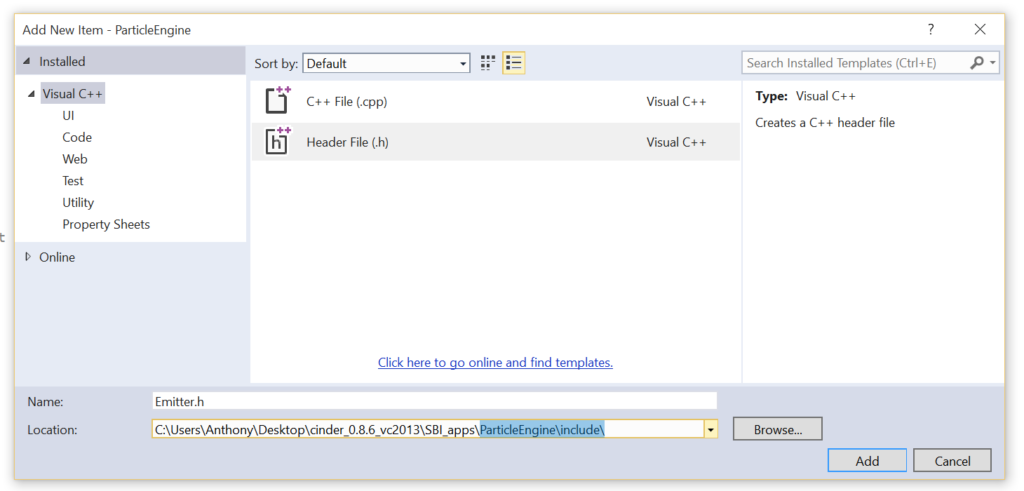
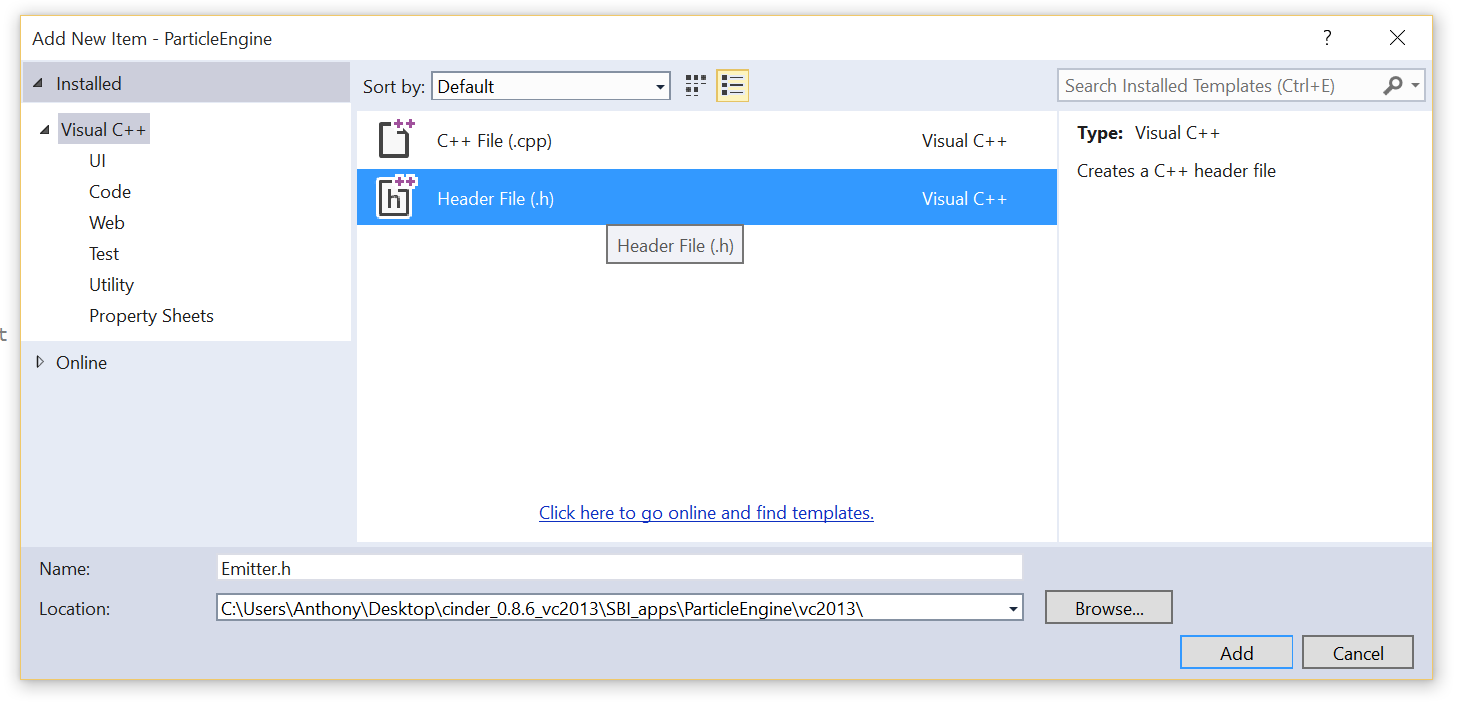
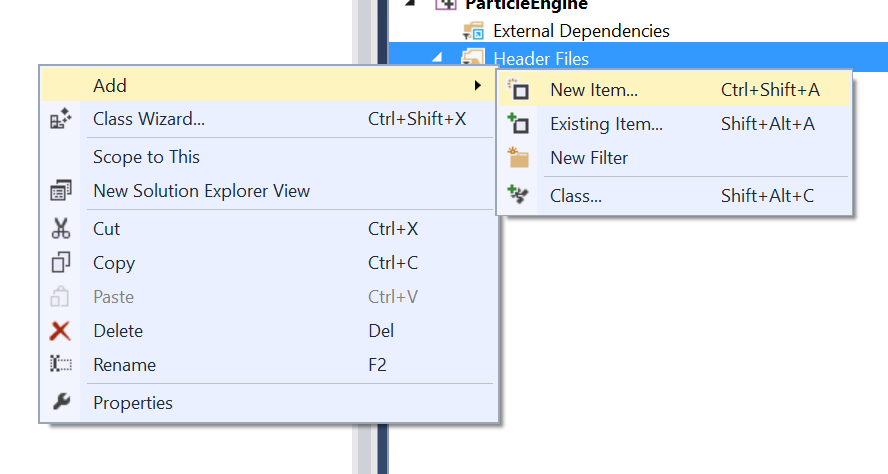
- Create a new file in our include directory called “Emitter.h” by adding new file, renaming it Emitter.h, making sure it saves into the include folder of your project, then finally press “Add”.

- Add our basic file includes and namespace uses
#pragma once   //make sure that file is only included once. Make sure this is at the top of all your header(.h) files!
#include "cinder/app/AppNative.h"
#include "cinder/gl/gl.h"
#include "Particle.h"

using namespace ci;
using namespace ci::app;
using namespace std;
- Add our basic class definition and some standard member variables
class Emitter { public: Vec3f mPosition; Vec3f mConstantForce; vector<Particle> mParticles; Emitter(); void setup(); void update(); void draw(); }; - Add our empty methods to get the following file
#include "cinder/app/AppNative.h"
#include "cinder/gl/gl.h"
#include "Particle.h"

using namespace ci;
using namespace ci::app;
using namespace std;

class Emitter
{
public:
Vec3f mPosition;
Vec3f mConstantForce;
vector<Particle> mParticles;

Emitter();

void setup();
void update();
void draw();
};

Emitter::Emitter()
{
}

void Emitter::setup()
{
}

void Emitter::update()
{
}

void Emitter::draw()
{
}
Particle Class (ParticleEngine_2)
So now we want to create our Particle.h class in a similar skeletal manner. We want some variables for tracking the particles like position, velocity, and constantForce (such as gravity); But we also want variables to describe each particles “lifespan” and current “age” as we will use these to know when a particle is dead and needs to be recycled; and to change things such as scale and alpha so that as a particle gets older it gets smaller and more transparent. The code for Particle.h is as follows.
#include "cinder/app/AppNative.h" #include "cinder/gl/gl.h" using namespace ci; using namespace ci::app; using namespace std; class Particle { public: Vec3f mPosition; Vec3f mVelocity; Vec3f mConstantForce; int mAge; int mLifespan; Particle(); void update(); void draw(); }; Particle::Particle() { } void Particle::update() { } void Particle::draw() { }Now that we have a basic framework for each of our classes we will want to flesh them out. First let’s flesh out the Particle.h class.
- Want to add some sort of starting parameters so we can decide where particles are created and what starting conditions they have. We will do this in the constructor so that when we create a Particle we are creating it immediately with new parameters. Notice how random is used to create some variation to our starting parameters so not every particle is created the same. If you use random be sure to include “cinder/Rand.h” at the top of your file.
Particle(Vec3f position, Vec3f velocity, int lifespan, Vec3f constantForce);
Particle::Particle(Vec3f position, Vec3f velocity, int lifespan, Vec3f constantForce) { mPosition= mInitPosition = position + (Rand::randVec3f() * Rand::randFloat(0.1f, 0.3f)); mVelocity= velocity; mAge= 0; mLifespan= (int)((float)lifespan * Rand::randFloat(0.6f, 1.4f)); mConstantForce = constantForce * Rand::randFloat(0.9f, 1.1f); } - Next we want to modify our update function to update position based on the constantForce, age, then check if age is past lifespan. If it is we need to reset some properties. In the next step we will create the reset function.
void Particle::update() { mVelocity = mConstantForce; mPosition += mVelocity; mAge++; //check if dead //if dead we reset properties and move back to emitter to be recycled if (mAge > mLifespan) { reset(); } } - Now we want to develop our reset function. The reason we we want to recycle particles instead of destroy then create new ones is that by recycling particles we are putting less stress on the CPU and RAM to create and destroy as it is easier to merely change some variables in a piece of memory already in use. When there are 1000’s of particles this difference can become significant.
void Particle::reset() { mPosition = mInitPosition; mAge = 0; mVelocity = Vec3f(0.0f, 0.0f, 0.0f); }You’ll notice I have additional variables that saved what the initial vars were so we can go back to them. So we’ll have to define those in our class as well.
Vec3f mInitPosition; float mInitAge; Particle(Vec3f position, Vec3f velocity, int lifespan, Vec3f constantForce); void update(); void draw(Vec3f * camRight, Vec3f * camUp); void reset();
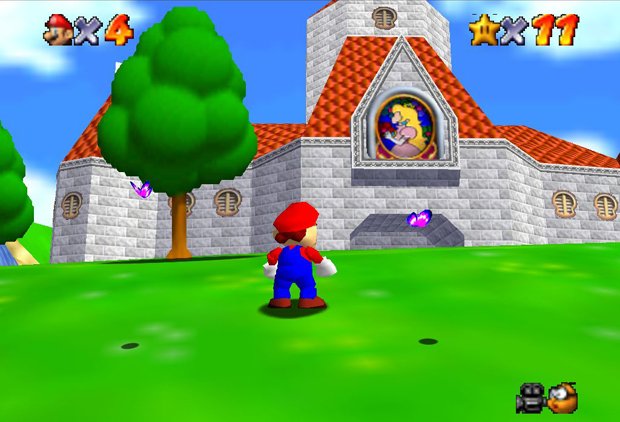
- Next we want to develop our draw function. This will take all parameters and draw a “billboard”, which in Cinder means it is a quad that always face towards the camera. If you ever played Maroio64 and noticed the trees were actually 2D objects that always faced you you were looking at billboards.
 To create billboards in Cinder we need two vectors from the camera: a right-pointing vector and an up-pointing vector. We’ll take about how to get these in the Emitter class. We will also pass them as pointers in this case for a slight speed increase (passing a pointer/integer is faster than passing and copying an entire object).
void Particle::draw(Vec3f * camRight, Vec3f * camUp) { float scale = 1.0f - ((float)mAge / (float)mLifespan); glColor4f(1.0f, 1.0f, 1.0f, scale); gl::drawBillboard(mPosition, Vec2f(scale, scale), 0.0f, *camRight, *camUp); }Also don’t forget to define this function in your class definition!
void draw(Vec3f * camRight, Vec3f * camUp)
Emitter Class (ParticleEngine_3)
So now we will flesh out the Emitter class that will create and control all particles. We will start with a setup function where we define the starting conditions such as where the emitter is, its constant force (such as gravity), and of cours ether number of particles. We will also load a texture here that we will use for each particle.
- So first add a texture and imageIO include and Texture variable definition to your Emitter class
#include "cinder/gl/Texture.h" #include "cinder/ImageIo.h"
gl::Texture mParticleTexture;
Then we will develop the setup function
void Emitter::setup(Vec3f position, int numParticles, Vec3f constantForce) { mPosition = position; mConstantForce = constantForce; mParticleTexture = gl::Texture(loadImage(loadAsset("GlowParticleRed.png"))); addParticles(numParticles); } - Now we want to develop our update function. It will be very straightforward as we want to merely iterate through all particles and update each individually. This iterating uses the vector iterator. It is a very fast way to iterate through a list as if they were pointers.
void Emitter::update() { for (vector<Particle>::iterator part = mParticles.begin(); part != mParticles.end(); part++) { part->update(); } } - Now we want to develop the draw function. Again we just iterate through all particles; but we also need to use some Cinder camera utility functions to get the billboard vectors to pass to each particle draw function.
void Emitter::draw(CameraPersp cam) { Vec3f camRight; Vec3f camUp; cam.getBillboardVectors(&camRight, &camUp); gl::color(1.0f, 1.0f, 1.0f, 1.0f); //making sure the texture is not tinted by colouring white mParticleTexture.enableAndBind(); //bind once means this is faster than binding for every particle for (vector<Particle>::iterator part = mParticles.begin(); part != mParticles.end(); part++) { part->draw(&camRight, &camUp); } mParticleTexture.unbind(); } - And now the addParticles function. It will be a straightforward for-loop
void Emitter::addParticles(int numParticles) { for (int i = 0; i < numParticles; i++) { mParticles.push_back(Particle(mPosition, Vec3f(0.0f, 0.0f, 0.0f), 30, mConstantForce)); } }And now we want tp use this particle engine in our mainApp class!
Using the Particle Engine (ParticleEngine_4)
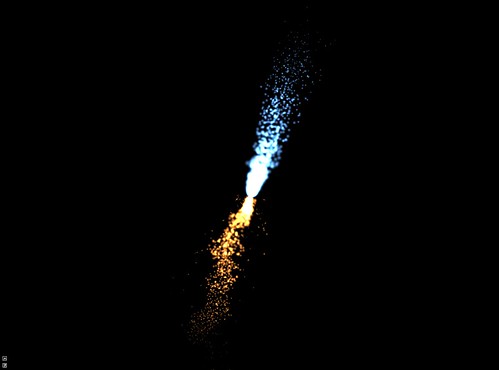
Now here is where we make sure everything works by creating an emitter that will act look a bit like a candle flame in our App class. We will also use a MayaCamUI object to allow ourselves to easily zoom and rotate the camera to get a better look.
- So first we want to include and define the ParticleEngine and MayaCamUI
#include "cinder/gl/gl.h"
#include "cinder/MayaCamUI.h"


Emitter mEmitter;
MayaCamUI mMayaCam;

We’ll also add a mouseDrag function for the MayaCam

void mouseDown(MouseEvent event);
void mouseDrag(MouseEvent event);
- Next we’ll develop the setup function so that we have an emitter of 500 particles at the origin with a small force up. A note that we will also need to set some gl parameters here so everything looks right. Try commenting them out to see what happens when you don’t set them.
void ParticleEngine_4App::setup() { mEmitter.setup(Vec3f(0.0, 0.0f, 0.0f), 500, Vec3f(0.0f, 0.2f, 0.0));CameraPersp initCam; initCam.setPerspective(45.0f, getWindowAspectRatio(), 0.01, 1000.0f); mMayaCam.setCurrentCam( initCam ); glEnable( GL_TEXTURE_2D );   //enables texturing glDisable( GL_DEPTH_TEST );  //removes strange artefacts when rendering particles with no depth gl::enableAdditiveBlending();  //need to enable alpha blending to blend .png alpha on particle texture. "additive" is a special type of blending. } - Then we should develop the mouseDown and mouseDrag function for the MayaCamUI
void ParticleEngine_4App::mouseDown( MouseEvent event ) { if ( event.isAltDown() ) { mMayaCam.mouseDown( event.getPos() ); } }void ParticleEngine_4App::mouseDrag(MouseEvent event) { if (event.isAltDown()) { mMayaCam.mouseDrag(event.getPos(), event.isLeftDown(), event.isMiddleDown(), event.isRightDown()); } } - Then the update function – very simple!
void ParticleEngine_4App::update() { mEmitter.update(); } - Then finally the draw function. Don’t forget to set camera matrices.
void ParticleEngine_4App::draw()
{
// clear out the window with black
gl::clear( Color( 0, 0, 0 ) );
gl::setMatrices( mMayaCam.getCamera() );
mEmitter.draw(mMayaCam.getCamera());
}
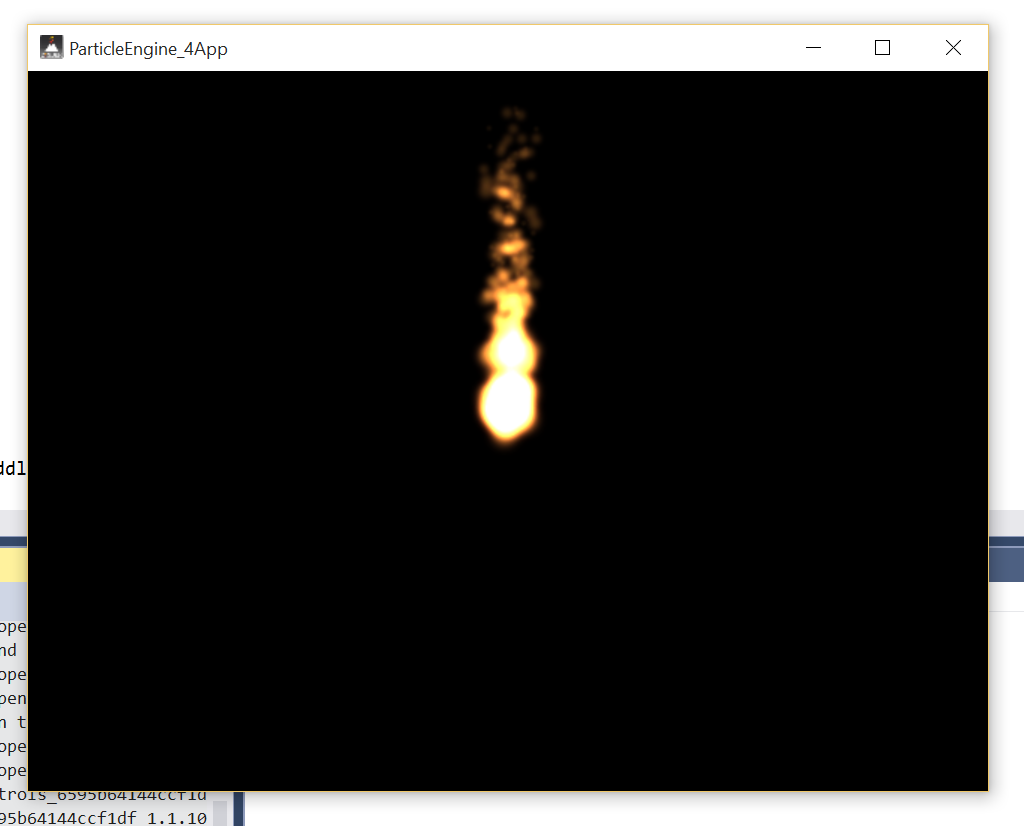
If all went well you should see the above image. If not read the errors carefully and try to understand them, look through this tutorial, and also the example code on CULearn under Cinder Frameworks “Particle Engine”.And of course I am available through email. Good luck!